We often hear from our customers that it’s hard to envision what a redesigned kitchen will look like in their space. To help, we offer the following before and after story based on one of our real-life customer installations.
Gary and Jodi first came to our showroom because their current kitchen wasn’t working for them anymore. They wanted a better workflow but didn’t want to lose the seating for four on their island. However, the island was too big for the space, causing tight walkways on all sides.
In order to maintain seating for four, we decided to turn the island into a peninsula so we could pull it away from the rest of the kitchen and up against a wall.
Gary and Jodi decided to go with a natural cherry cabinet which gives the room a rich feel. Their choice of wall color, backsplash, and granite countertop complement the warm tones of the wood.
Here are some before and after shots to take a look at:
[one_half]
Before: Island in center of kitchen.
[/one_half][one_half_last]
After: We replaced the island with a peninsula to maintain seating for four, but allowing more walk area around.
[/one_half_last]
[one_half]
Before: The range was pressed right up against the end wall and there was very limited space between the sink and the range.
[/one_half][one_half_last]
After: We moved the range off this wall to provide more counter space around the sink. We also recessed the wall cabinet above the sink to allow more head room.
[/one_half_last]
Before: Wall with fridge.
[one_half]
After: We moved the range from the sink wall and turned it into a wall oven and induction cooktop.
[/one_half][one_half_last]
After: Close-up of induction cooktop and tumbled marble backsplash.
[/one_half_last]
[one_half]
Before: Seating at the island, looking into the kitchen.
[/one_half][one_half_last]
After: Peninsula that we anchored to the newly constructed knee wall.
[/one_half_last]
[one_half]
After: We also added a cabinet for a future computer and included a grommet in the granite countertop for routing cables.
[/one_half][one_half_last]
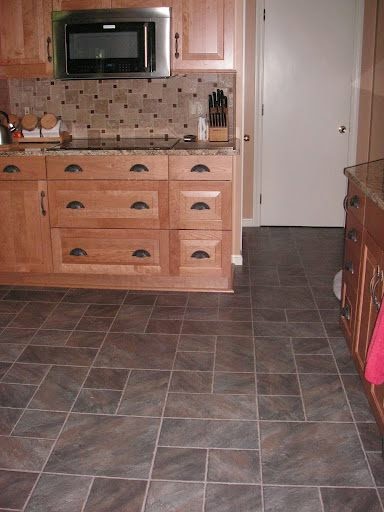
After: The new Armstrong laminate flooring.
[/one_half_last]
[one_half]
Before: The existing cabinet sat on top of the basement stairs and had been cut to fit alongside the other cabinets on that wall, making the bottom of the cabinet unusable. Here is what the cut in the cabinets looked like and how the space was unusable. The brown is the back of the stairway.
[/one_half][one_half_last]
After: We cut the oven cabinet to allow for the stairway, as the original cabinet had done. However, we applied a real cherry veneer to the inside of the cabinet and attached the drawer head with special hinges, allowing the area to be accessed.